Tuesday, August 25, 2015
Home Improvements: Under $100
Tip 1: Spend an hour with a pro.
Invite a realtor or interior designer over to check out your home. Many realtors will do this as a courtesy, but you will probably have to pay a consultation fee to a designer. Check with several designers in your area; a standard hourly fee is normally less than $100, and in an hour they can give you lots of ideas for needed improvements. Even small suggested improvements, such as paint colors or furniture placement, can go a long way toward improving the look and feel of your home.
Tip 2: Inspect it.
Not every home improvement is cosmetic. Deteriorating roofs, termite infestation or outdated electrical systems — you can't fix it if you don't know it's broken. Hire an inspector to check out the areas of your home that you don't normally see. They may discover hidden problems that could negatively impact your home's value. Small problems (such as a hidden water leak) can become big, expensive problems quickly; the longer you put off repairs, the more expensive those repairs will be.
Tip 3: Paint, paint, paint.
One of the simplest, most cost-effective improvements of all is paint! Freshly painted rooms look clean and updated — and that spells value. When selecting paint colors, keep in mind that neutrals appeal to the greatest number of people, therefore making your home more desirable. On average, a gallon of paint costs around $25, leaving you plenty of money to buy rollers, painter's tape, drop cloths and brushes. So buy a few gallons and get busy!
Tip 4: Find inspiration.
An alternative to hiring a designer is to search for remodeling and decorating inspiration in design-oriented magazines, books, TV shows and websites. Simply tear out or print off the ideas you want to try and start your to-do list. Keep it simple — when remodeling on a tight budget, do-it-yourself projects are best.
Tip 5: Cut energy costs.
The amount of money you spend each month on energy costs may seem like a fixed amount. An energy-efficient home will save you money now, which can be applied to other updates, and is a more valuable and marketable asset in the long run.
Wednesday, September 3, 2014
Storm Door Repairs
Fixing common problems that occur with storm doors.
Storm doors are often made with flimsy parts, including the
latch, hinge, and closer. Fortunately these parts are easy to replace. However,
you may find it worthwhile to replace the entire storm door with a
more substantial and weather-resistant one if it has several problems.
Most parts can be found at a home center. If you
do not find the part you need, try searching Internet sources.
Prestart Checklist
Time
An hour or so for most repairs
An hour or so for most repairs
Tools
Screwdriver, drill, pliers
Screwdriver, drill, pliers
Skills
Basic mechanical skills
Basic mechanical skills
Prep
Check the door for binding and other obstructions that could be causing problems.
Check the door for binding and other obstructions that could be causing problems.
Materials
Replacement parts to match, spray lubricant
Replacement parts to match, spray lubricant
Spray the latch

Spray the latch and any moving parts -- including where
panes slide -- with lubricant to keep them in smooth working order.
Install replacement closer

Closers lose their dampening power over time. To
install a replacement closer, use a drill with a screwdriver bit
to attach the jamb-side bracket, then the screws that hold the closer to the
door.
Adjust closer tension

Adjust a closer to the correct tension by turning the
adjustment screw at the end of the cylinder.
Tighten piano-type hinge

Try driving longer screws if the long piano-type hinge comes
loose. You may need to drill pilot holes and drive them at an angle so they
catch solid wood.
Install wind chain

A wind chain keeps the door from blowing wide open, which
can damage the hinge. It installs easily with a few screws.
Wednesday, March 26, 2014
Monday, February 10, 2014
Saturday, December 28, 2013
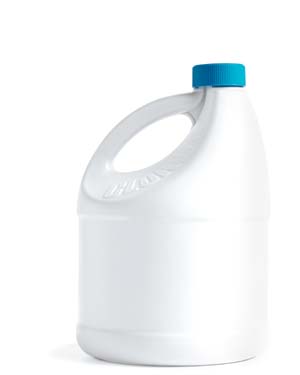
Can I kill mold with bleach?
Yes you can use bleach to kill mold, and lions and tigers and bears and humans and pets too. Bleach is poisonous and toxic. You can use bleach to kill any number of living organisms. However, it is not a good choice for killing mold.
Does this mean that Mom was wrong about Bleach?
Mom taught us that the answer to mold problems has always been bleach. “Spray it on, cover your eyes, hold your breath and run away from the toxic fumes.” Mold and mildew have already compromised our Indoor Air Quality. Bleach, or more specifically chlorine bleach, is a respiratory irritant. Introducing bleach into an indoor environment that is already polluted from a mold infestation is not a good idea.

Exposure to Chlorine Bleach can cause the following symptoms:
- Airway irritation &Wheezing
- Difficult breathing
- Sore throat & Cough
- Eye irritation
- Skin irritation & burning
The severity of health effects depends on the degree and length of exposure.
The Most Important Reason to not use Bleach to kill Mold
When you use bleach to kill mold, although the mold would disappear, it was only days or weeks before it was back again. The biggest reason you don’t want to use is after it kills the existing mold it creates new mold. How does the bleach do that? Because it is diluted with water and water is one necessary component for creating mold growth.
What happens when you spray some chlorinated bleach on the wall is that the bleach kills the mold and the water that has diluted the bleach soaks into the wall. So the bleach has killed the mold but now you have a wet wall, just like the one that caused the mold growth in the first place. A few days to a few weeks later the mold returns.
With mold, what you can see is only the tip of the iceberg. 10% of Mold you see… 90% of Mold is microscopic. Most of the suspended airborne particles are too small to see; yet small enough to be respired (breathed into the lungs) which causes damage to your home, sickness and disease in people and pets. These invisible particles are a serious health risk concern.
How do you control mold?
Natural enemies to mold growth are sunlight and ventilation. While it may be impossible to bring direct sunlight to certain areas of your home like the basement, crawl space and attic you can increase ventilation.
When it comes to removing humidity and water vapor you need a ventilation system that works year round. You also need to find any source of water or moisture that allows the mold to grow.
Sunday, December 22, 2013
Saturday, December 7, 2013
Subscribe to:
Posts (Atom)